

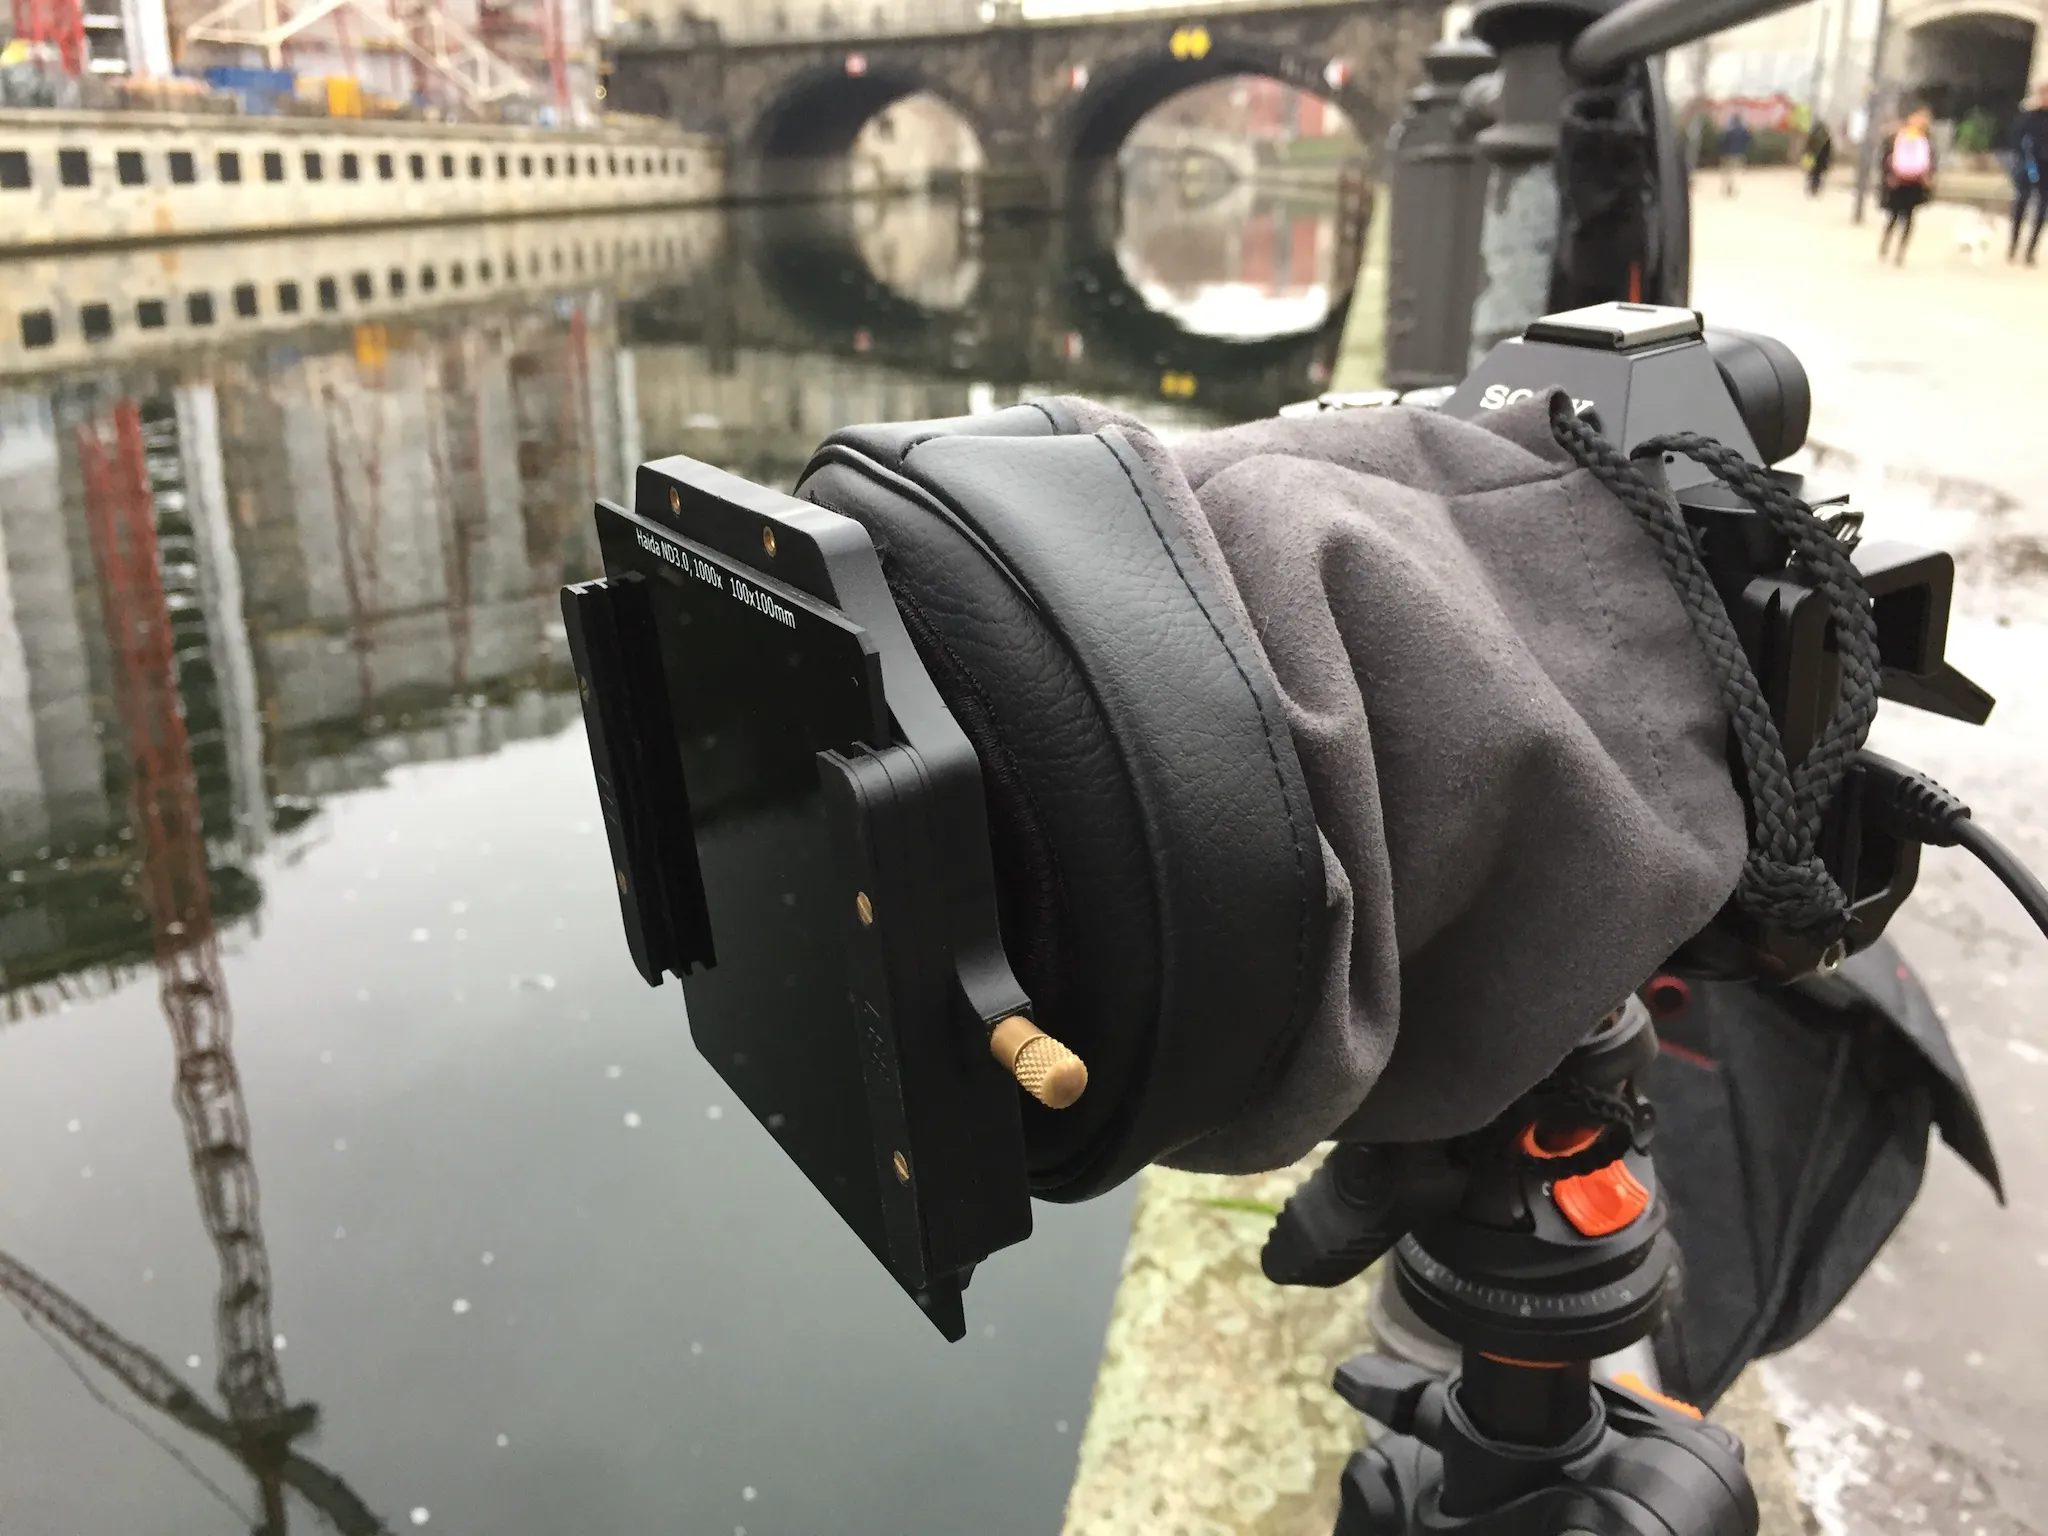
In den letzten 3 Monaten hatte ich die Gelegenheit gehabt das Samyang 24mm Tilt Shift (TS) Objektiv ausgiebig zu testen und möchte mit euch meine Erfahrungen teilen.
Ich habe freundlicherweise das Objektiv von direkt Samyang zum Testen erhalten, wofür ich mich sehr bedanken möchte. Natürlich werde ich, wie auch in der Vergangenheit, meinen persönlichen Eindruck vermitteln. Ich habe keine Laboruntersuchung vorgenommen, sondern berichte euch von meinen Erlebnissen aus der Praxis.
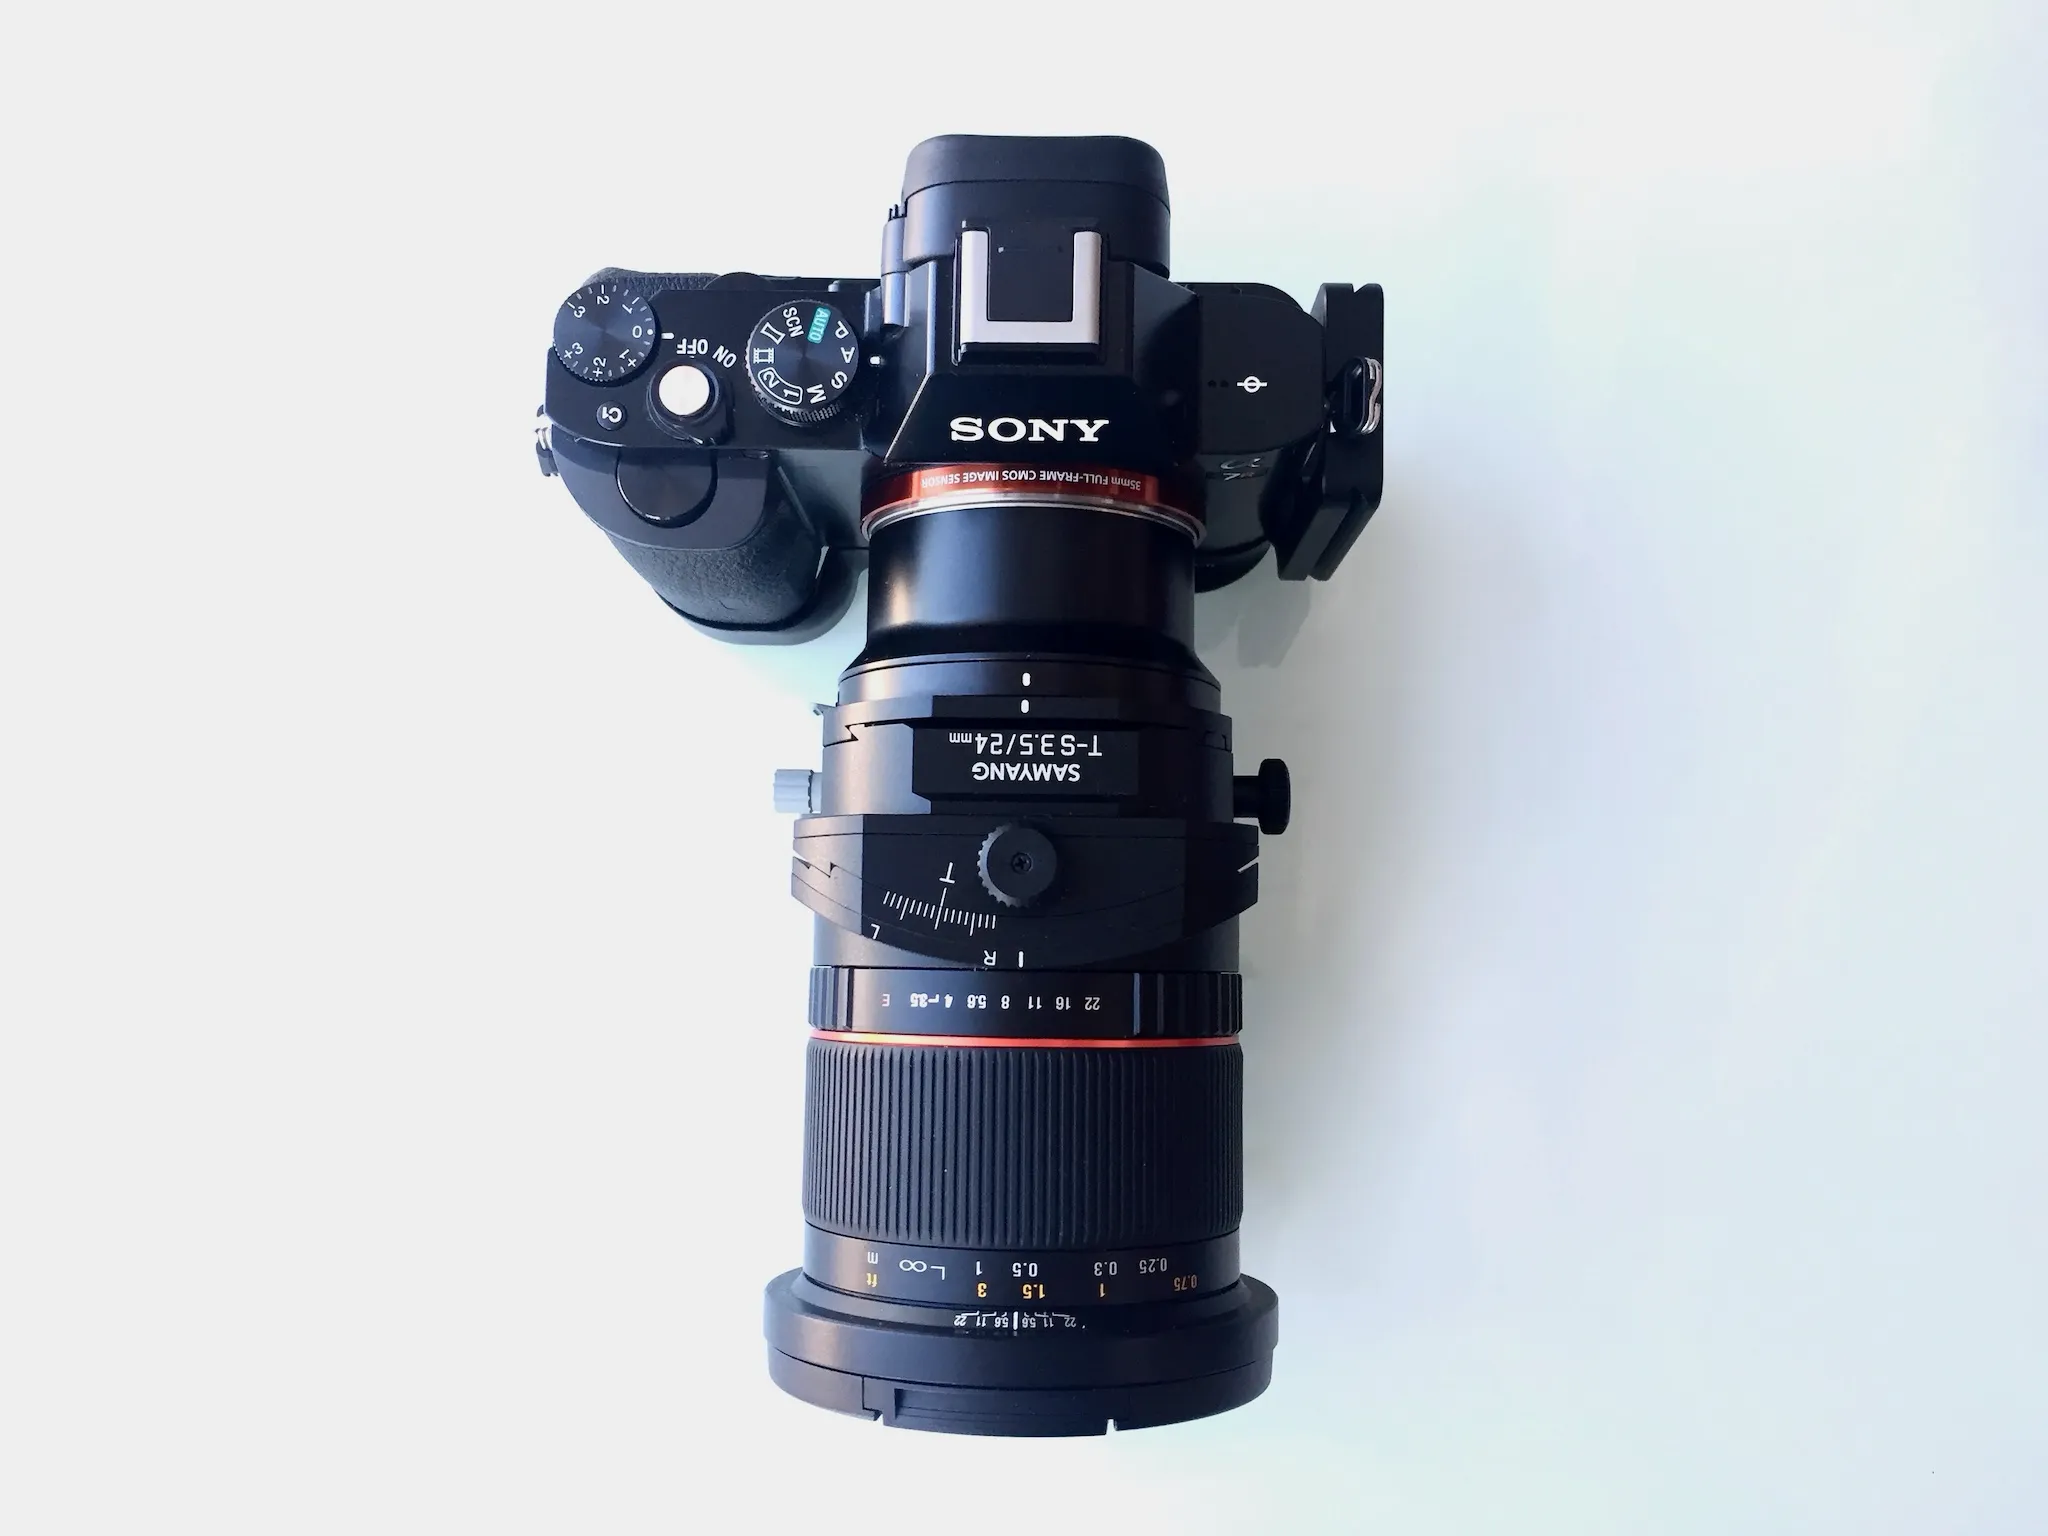
Samyang 24mm Tilt Shift – Das Objektiv
Verarbeitung
Das Objektiv ist sehr hochwertig verarbeitet. Ich sehe und spüre keinen Unterscheid zu anderen High Class Objektiven von anderen Anbietern. Die Verarbeitung spricht für das Design Team von Samyang, es ist eine Profi Linse.
Fokus und (manuelle) Blende
Tilt Shift Objektive haben aufgrund ihrer mechanischen Bauart keinen Autofokus. Da ich sowieso immer mit manuellen Fokus arbeite ist es für mich also keine Umstellung.
Deshalb ist für mich der Fokusring sehr wichtig. Der Fokusring des Samyang 24mm Tilt Shift ist weich und leichtgängig, jedoch mit einem gewissen Widerstand. So ist es mir möglich leicht, schnell und gleichzeitig sehr präzise den Fokus festzulegen.
Das Samyang hat zudem eine manuelle Blende. Das bedeutet man legt die Blende nicht wie gewöhnlich in der Kamera fest, sondern am Objektiv selbst. Es ist am Anfang eine kleine Umgewöhnung, aber nicht wirklich störend. Bei meinem Sony E Mount wird der Blendenwert nicht zurück an die Kamera übergeben. Die Blende ist also nicht in den EXIF Daten zu sehen.
Den Namen des Objektivs, sowie die Blende trage ich ziemlich einfach in Lightroom mit dem LensTagger Plugin ein (ich habe eine Anleitung hier in meinem Blog schon einmal beschrieben).
Schärfe
Ich bin kein großer Freund von Labortests. Ich habe mich im Internet ein bisschen umgesehen und kann die Ergebnisse bestätigen. Die Linse ist scharf, aber auch nicht zu scharf (man möge sich nur an die Sigma Objektiv Diskussion denken, die das Objektiv zu scharf finden).
Für Architektur ist die Schärfe natürlich sehr wichtig und das Samyang 24mm TS entspricht absolut meinen Anforderungen! Ich bin mehr als zufrieden.

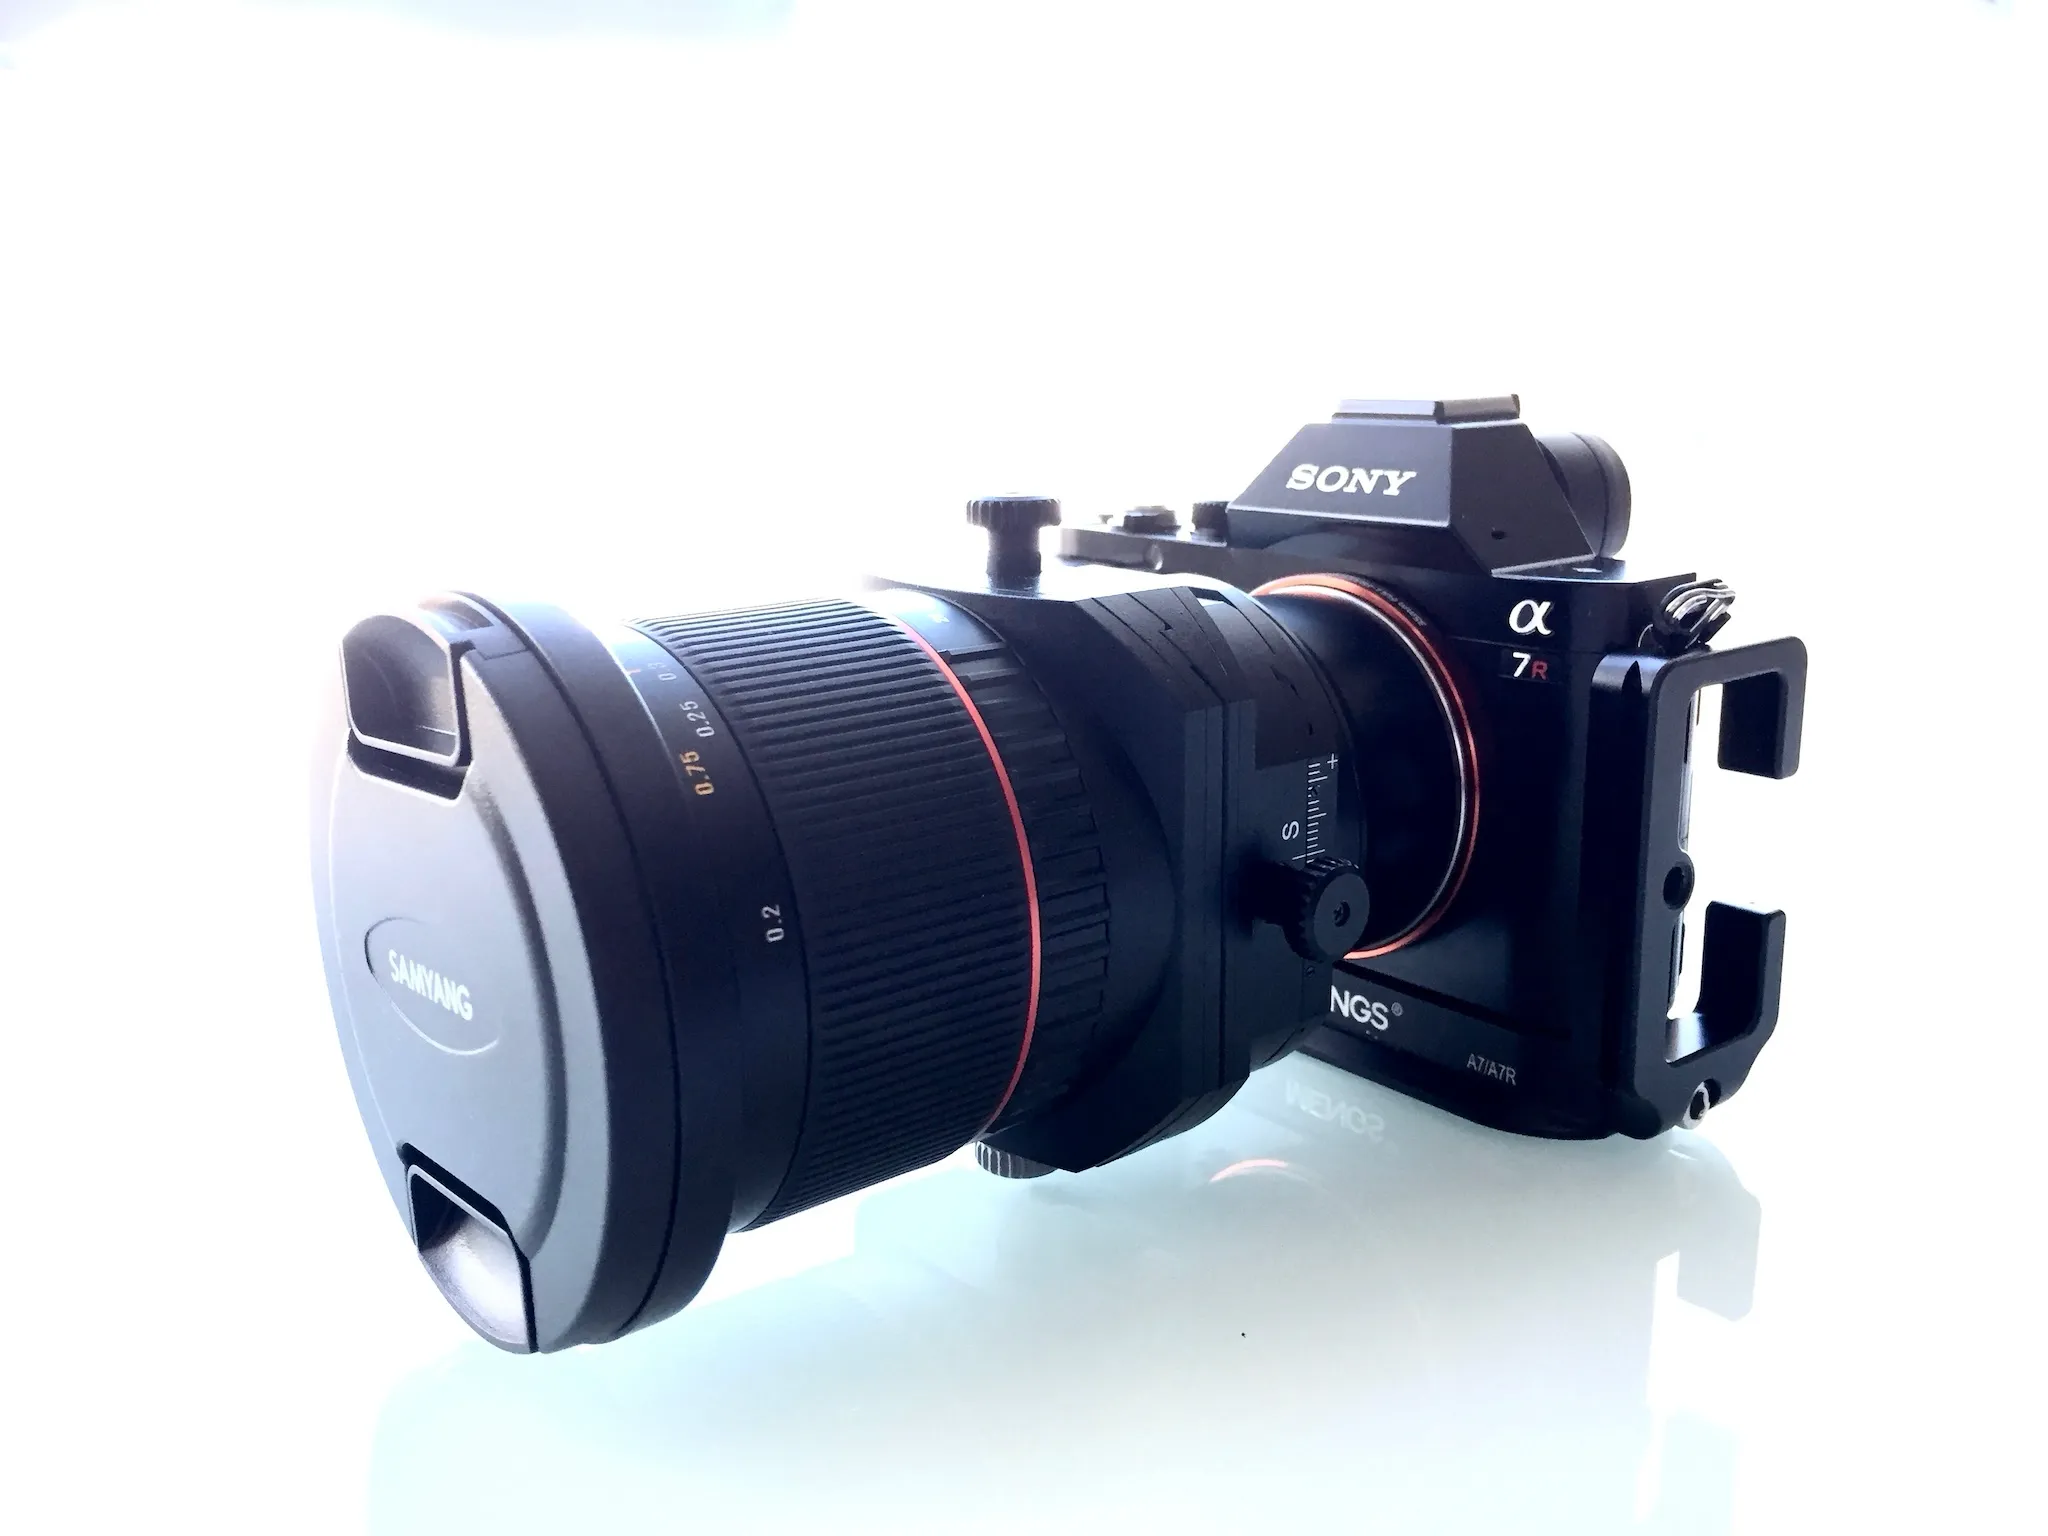
Besonderheit der Sony E Mount Ausführung
Eine kleine Besonderheit bei meiner Ausführung gibt es jedoch. Das Objektiv ist nicht zu 100% für das Auflagemaß der Sony FE gefertigt. Durch eine Metallverlägerung zum eigentlichen Objektiv wird der Spiegelkasten simuliert. Es entsteht dadurch kein Nachteil, das Objektiv ist lediglich ein wenig länger als zum Beispiel bei Canon. Ich finde den FE Mount dennoch wichtig, da sonst ein Objektivadapter (z. B. Metabones) dazwischen geschalten werden müsste.
Samyang 24mm – Die Tilt und Shift Funktion
Wie alle TS Objektive kann man tilt und shift unabhängig voneinander, oder kombiniert verwenden. Das tilten verschiebt die Schärfeebene und das shiften verschiebt die Projektion des Bildes.
Beide Funktionen können direkt angewendet werden, oder man dreht das Objektiv um 90 °, so dass sich der Effekt nicht nach oben/unten auswirkt, sondern nach rechts/links. Schauen wir uns das an einem konkreten Beispiel an.
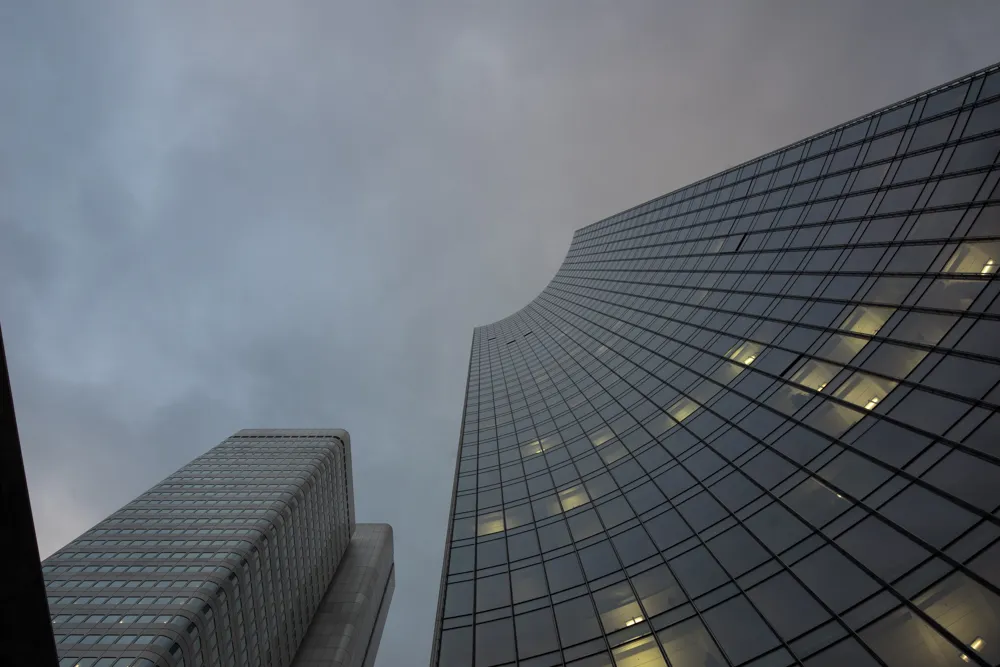
Shift (stürzende Linien)
Das ist die Funktion, die ich hauptsächlich benutzte. Damit können die stürzenden Linien von Gebäuden vermieden werden. Wenn das Objektiv um 90° gedreht wird, kann die Shift-Funktion verwendet werden, um schräge Linien zu vermeiden.

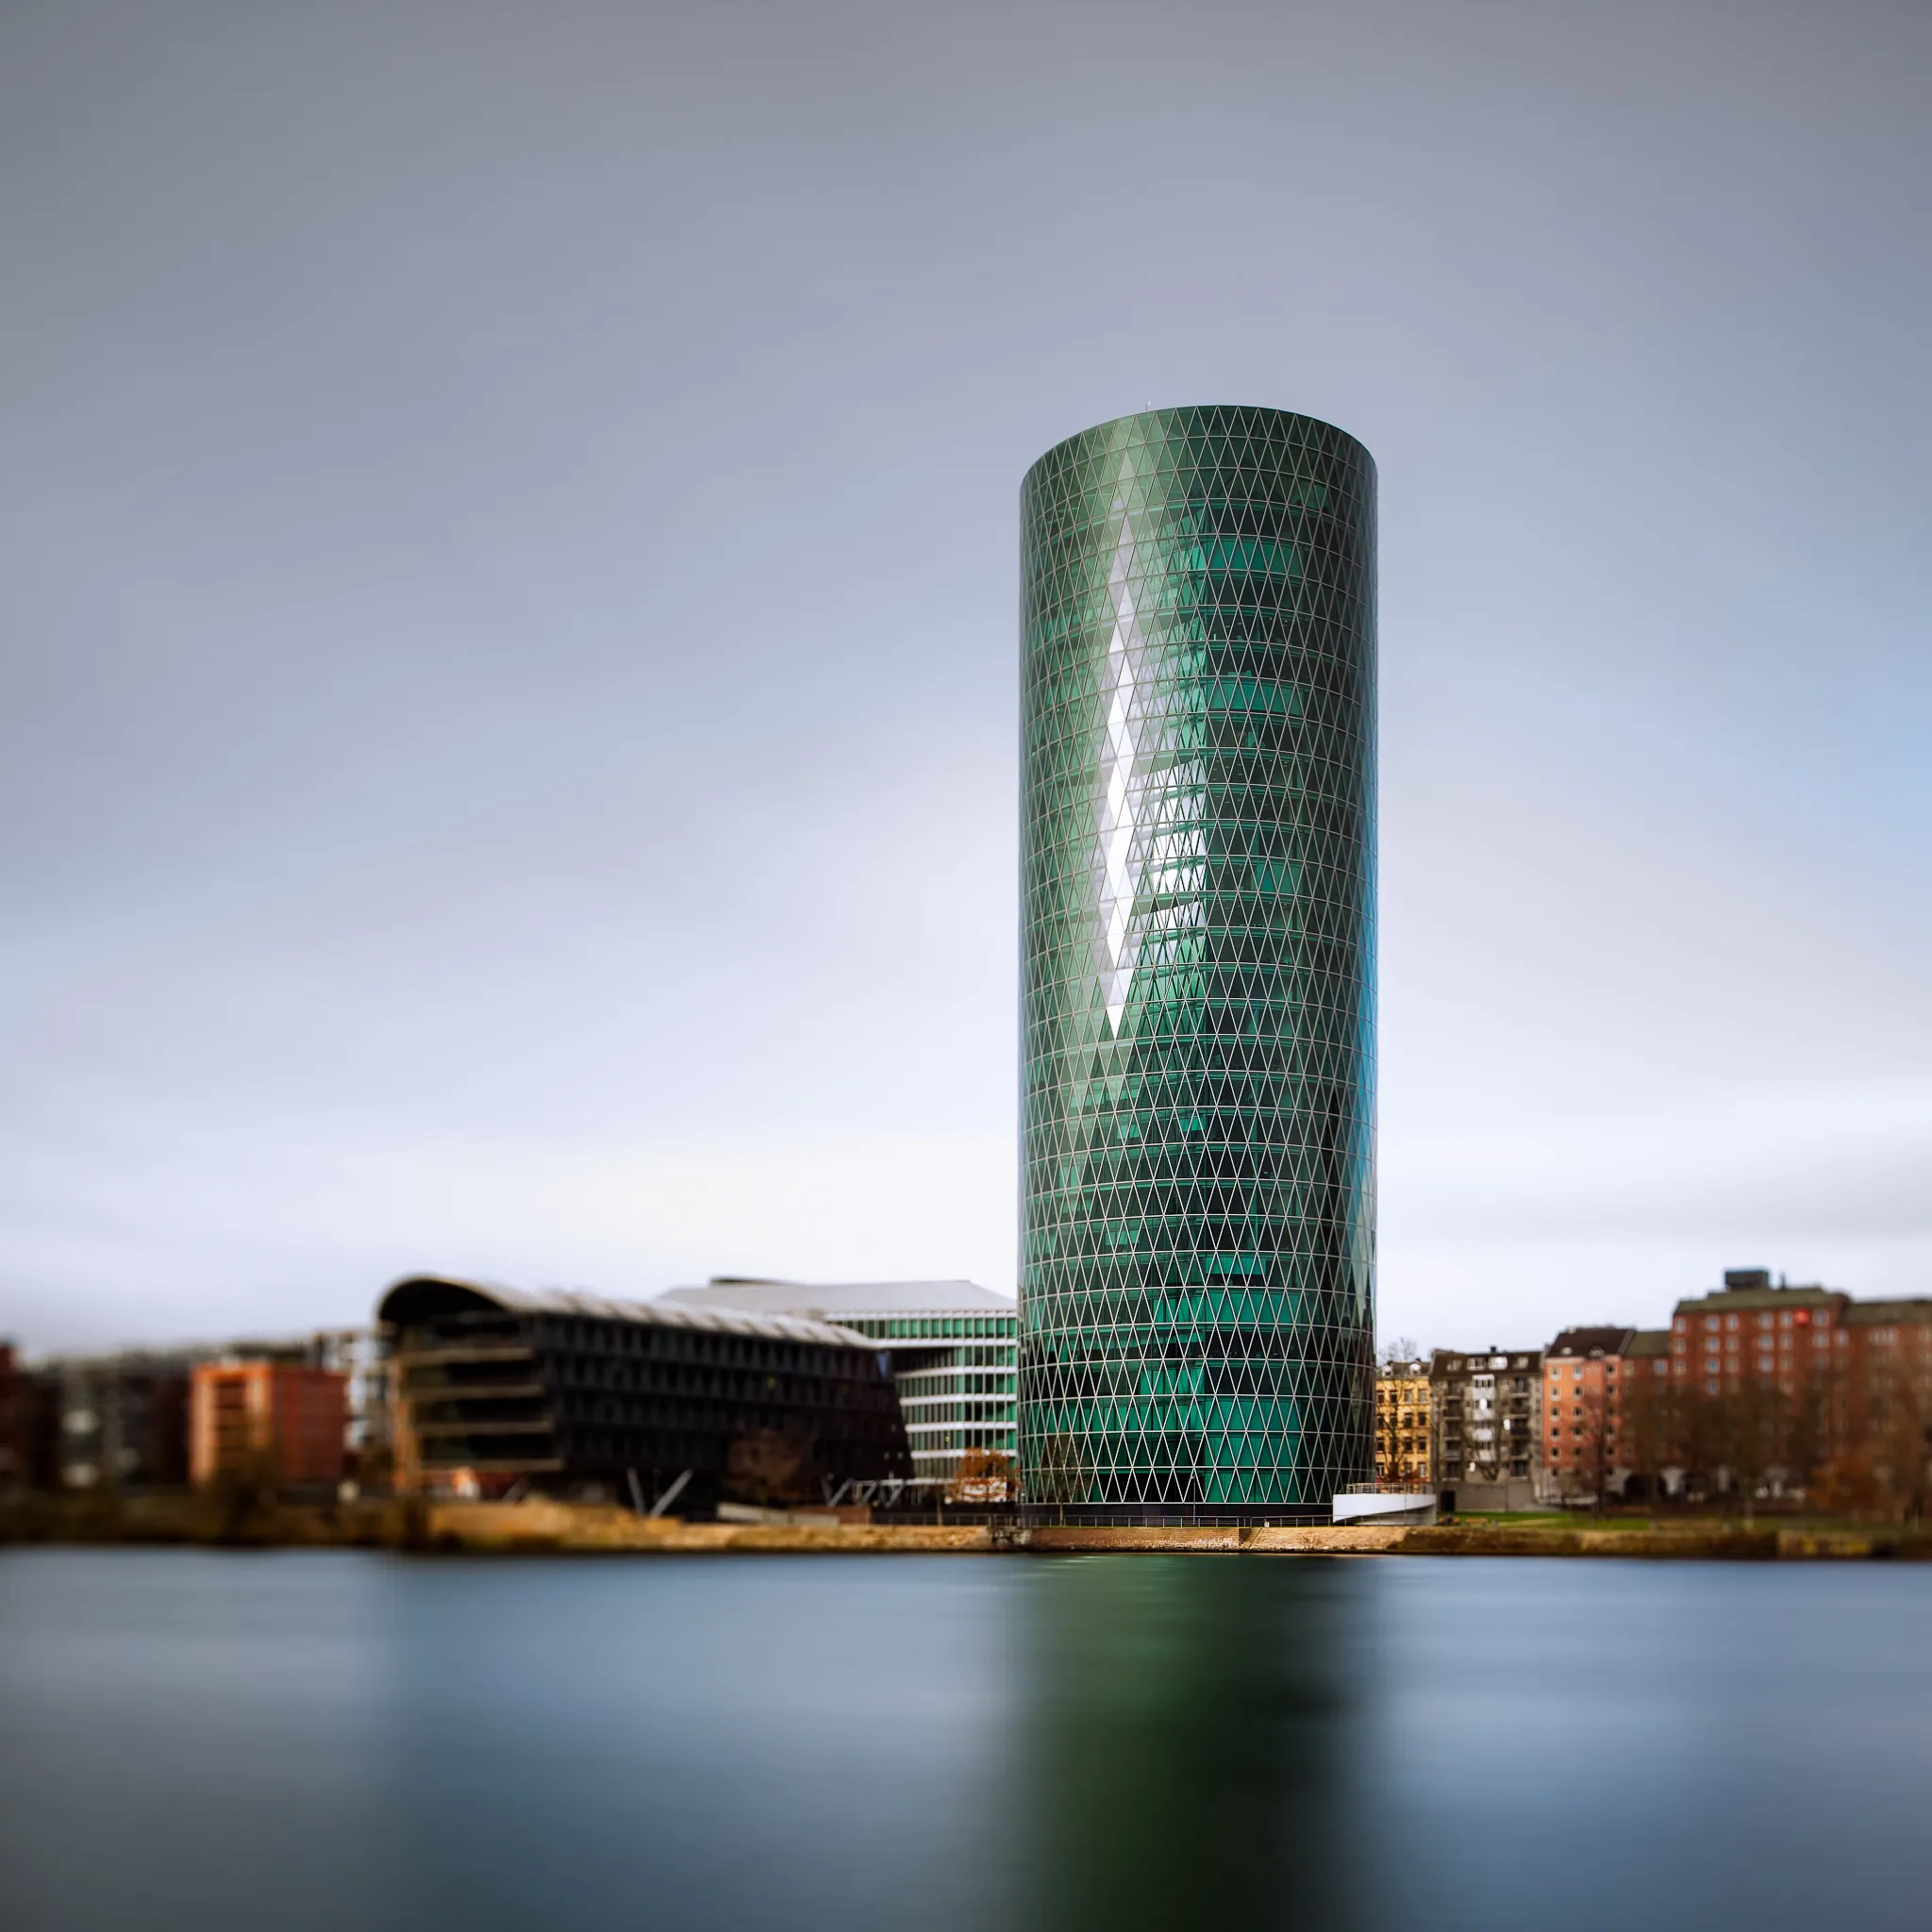
Copyright Timon Först
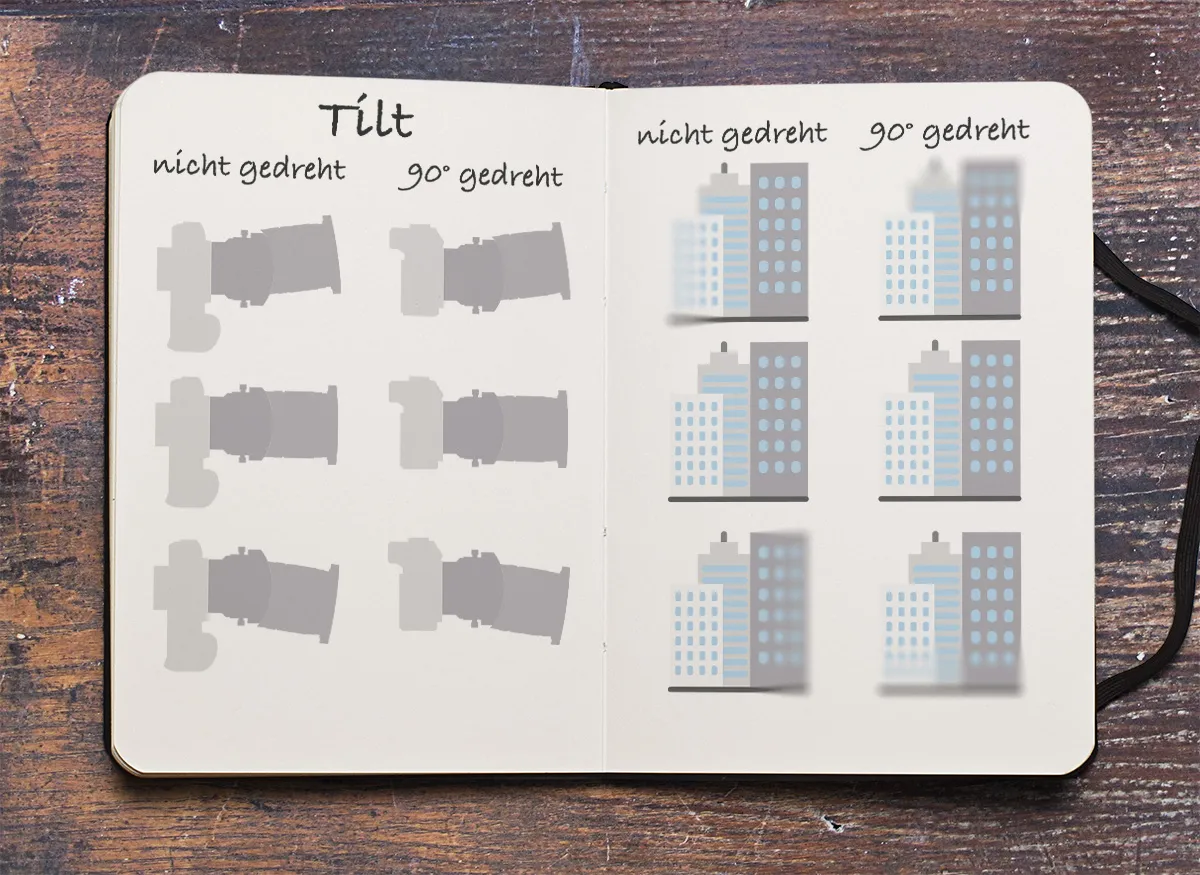
Tilt (Miniatur-Effekt)
Das tilten ermöglicht es die Schärfeebene zu verändern. Bei einem normalen Objektiv ist die Schärfeebene immer parallel zum Kamerasensor.
Was ist das Ergebnis, wenn wir den Winkel ändern? Das Bild wird teilweise unscharf. Die Unschärfe kann man mit der Blende steuern. Mit der Blende von 3,5f ist es natürlich sehr unscharf. Die Seite kann auch geändert werden, wenn man das Objektiv nach links oder rechts neigt. Oder man dreht das Objektiv um 90°, um den Effekt oben und unten einzusetzen. Die Tilt Funktion ist auch als Miniatur-Effekt bekannt.

Copyright Timon Först
Meine Erfahrungen
Langzeitbelichtung
Eine Sache die ich nicht bedacht habe ist, das ein Tilt-Shift Objektiv anders zu behandeln ist. Durch das shiften wird das Objektiv „geöffnet“. Durch die lange Belichtungszeit kann dann Licht eintreten. Deshalb muss das Objektiv abgedeckt werden, sonst leidet die Bildqualität. Da es bei langen Belichtungszeiten generell empfohlen wird das Objektiv und den Sucher abzudecken, ist das auch kein Problem – man sollte es nur wissen.
Vergleich am Beispiel einer Langzeitbelichtung


Shift
Natürlich hat mich vorrangig die Shift Funktion interessiert. Dadurch wird eine komplett andere Fotografie möglich!
In diesem Bild habe ich das shiften im klassischen Sinne gebraucht.

Copyright Timon Först
Es gibt aber auch noch andere Anwendungsmöglichkeiten, hinter denen man nicht sofort ein Tilt Shift erwartet.
Natürlich hätte ich im folgenden Beispiel auch in der Nachbearbeitung die Linien gerade setzten können, das ist aber immer mit Qualitätsverlust verbunden. Durch das shiften gewinnt man zwischen 20-100% der Pixel!

Copyright Timon Först
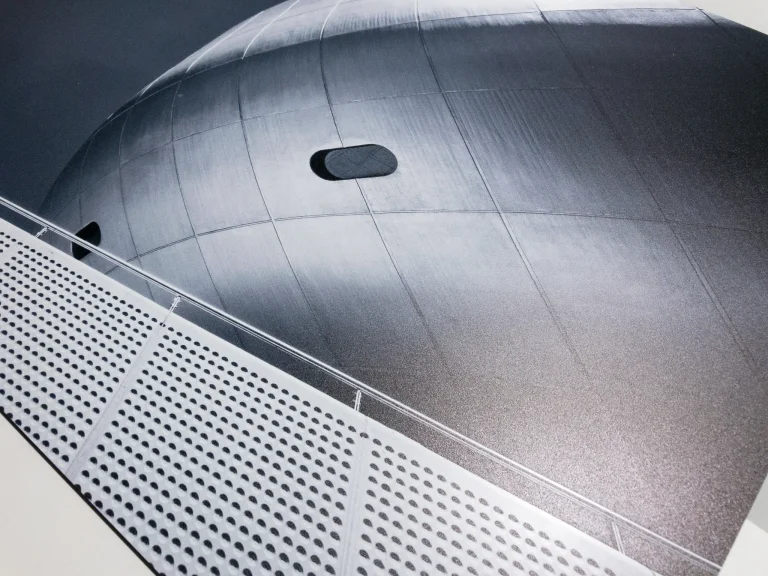
Das nächste Beispiel zeigt die Anwendung in der künstlerischen Fotografie. Dort hat mich das Samyang 24mm TS völlig überrascht!
Durch das shiften werden die stürzenden Linien normalerweise versucht zu beheben. Hier habe ich aber die Linien bewusst transformiert.
Außerdem ist es mir durch das TS Objektiv möglich anders zu fotografieren. In diesem konkreten Beispiel hat schon das nächste Gebäude oben in das Bild geragt. Durch das shiften konnte ich jedoch das Gebäude aus dem oberen Bildrand entfernen. Aber auch die Linien des Gebäudes sehen natürlicher aus, als wäre es ohne shiften fotografiert worden. Vergleicht es doch einmal selbst.

Copyright Timon Först
Resumé
Das Objektiv ist sehr hochwertig hergestellt. Die Bildqualität ist so wie ich es mir vorgestellt habe, sehr gut. Das shiften überrascht mich immer wieder aufs neue. Ich kann das Objektiv wirklich ohne Zweifel jedem empfehlen der gerade mit einem Tilt/Shift liebäugelt. Der Preis ist unbestochen gut und für Sony FE gibt es aktuell sowieso keine native Alternative.
Samyang hat durchaus gute Arbeit geliefert und verdient mehr vertrauen, als man vielleicht vermuten mag. Drittanbieter von Objektiven sind, eigentlich schon länger, ein deutlicher Konkurrent zu den Objektiven vom Kamerahersteller!
Habt ihr Fragen?
Wollt ihr noch mehr wissen? Vielleicht ein gewisses Detail das ich ausgelassen?
Schreibt eure Frage einfach in die Kommentare oder per Mail über mein Kontaktformular. Ich freue mich auch sehr über eure Meinung zu diesem Beitrag/Objektiv.
Schöner Bericht!
Ich bin ja nicht so in der Architektur unterwegs, aber es hört sich auf jeden Fall spannend an. Das Vermeiden von stürzenden Linien würde mir bei Cityscapes aber auch gefallen. Gerade bei Skylines, die ich gerne fotografiere.
Und, wandert es in deine Fototasche? Oder war es nur zum Testen?
Danke Michael. Ich denke auch das das Tilten für dich interessant sein kann. Da muss kann ja nur ganz leicht tilten, damit du die Landschaft von vorn bis hinten scharf kriegst, ohne Blende 16 😉
Samyang bietet eins für Fuji an, aber das Problem ist die Brennweite. Die 24mm sind mir am APS-C zu wenig. Wetterfest sind die auch nicht und das ist mir mittlerweile sehr wichtig. Da greife ich dann auf Exposure/Focus Blending zurück, um alles Scharf zu bekommen. Aber vielleicht gibt’s ja irgendwann die Eierlegende Wollmilchsau 🙂
Ach ja, hast den schönen Canon-Beutel geopfert 😉
Dazu folgt noch ein Beitrag 😉
[…] unscharfen Effekt konnte ich gut dafür einsetzten. Diesen Miniatur Effekt habe ich in meiner Vorstellung des Objektives auch genauer beschrieben, wenn jemand näheres dazu erfahren […]
Hallo, danke für den Bericht.
Ich habe mir kürzlich ebenfalls dieses Objektiv zugelegt. Was mir als sehr störend aufgefallen ist, es fehlt eine Streulichtblende! Das macht sich vor allem Nachts (aber durchaus auch Tags) durch störende Lensflares bemerkbar.
Durch die Suche danach bin ich übrigens auf diese Seite hier gestoßen. Da ich nichts passendes gefunden habe werde ich mir jetzt wohl etwas basteln müssen…
Zu Deiner Anmerkung über Lichteinfall sollte aber noch gesagt werden, daß bei einer spiegellosen Kamera durch den elektronischen Sucher natürlich kein Licht einfallen kann.
Hi Jörg,
ja da hast du recht. Streulicht kommt bei Nacht (durch externe Lichtquellen) aber auch Tagsüber (tiefstehende Sonne).
Ich kann mir nur denken das eine GeLi wahrscheinlich nur sehr schwer zu konstruieren ist, da man das Objektiv drehen und schwenken kann.
Allerdings weiß ich nicht wie Canon oder Nikon das löst, oder es überhaupt eine Lösung gibt.
Der Hinweis mit dem Sucher ist natürlich richtig, ich meinte die Aussage generell auf Langzeitbelichtungen und nicht speziell auf das System beschränkt. Aber bei solchen Details kann man ja beliebig Detailliert sein 😉
Gruß Timon
Guten Morgen.
Ich hätte eine Frage, möglicherweise „off topic“ hier.
Ich möchte mein Architekturbilder, vorher und nachher darstellen. Kann jemanden mir verraten wie sowas möglich ist. Ich meine nicht Standbilder vorher/nachher sondern, wie oben auf diese Seite dargestellt, eine mit der Maus beweglichen Linie.
Danke im Voraus
Desmond
Hi,
wenn du WordPress verwendest, gibt es dafür einige Plugins 😉
Gruß Timon
Hi,
Nice review and pictures! I’ve been in Frankfurt and I find your point of view on those familiar buildings is fresh one.
What other lenses and cameras do you use?
Cheers,
Dimiter
Hey,
at this point I used only my Camera. But for now I use my iPhone 😉
Hi there, I found your page while looking for T/S lens options for the E-Mount. Very nice article you’ve written here!
Kann man mit dem Objektiv gleichzeitig shiften und tilten wie bei dem Canon-Objektiv gleicher Brennweite? Das ist bei Interieur manchmal nötig, wenn ein Tisch oder Sessel im Vordergrund schon scharf sein soll, man gleichzeitig den Raum aber bis hinten scharf abbilden will.